Home Maintenance · DIY
There’s a sacrificial metal rod inside your water heater quietly rusting away so the tank doesn’t have to. Replace it on time and you can postpone a $1,500 replacement for years.
Most people meet their water heater exactly twice: the day it’s installed and the day it floods the basement. In between, it sits in a closet or garage doing its job, and almost nobody opens it up to look inside. That’s a shame, because there’s one component in there that determines, more than anything else, whether your tank lasts eight years or eighteen. It’s called the sacrificial anode rod, it usually costs around $20 to $50, and replacing it on schedule is the single highest-return maintenance task in the whole house. Ignore it and you’re essentially scheduling an early, expensive funeral for your water heater.
This guide explains what the anode rod is, why it matters so much, how to know when yours is shot, and how to replace it yourself if you’re handy. It’s not complicated work, but understanding the “why” makes the whole thing click.
The clever chemistry of sacrifice
Your water heater tank is steel, and steel in contact with hot water wants to rust. Left alone it would corrode through and leak in just a few years. The engineers who designed these tanks solved the problem with a beautifully simple trick borrowed from chemistry: they gave the corrosion something else to eat.
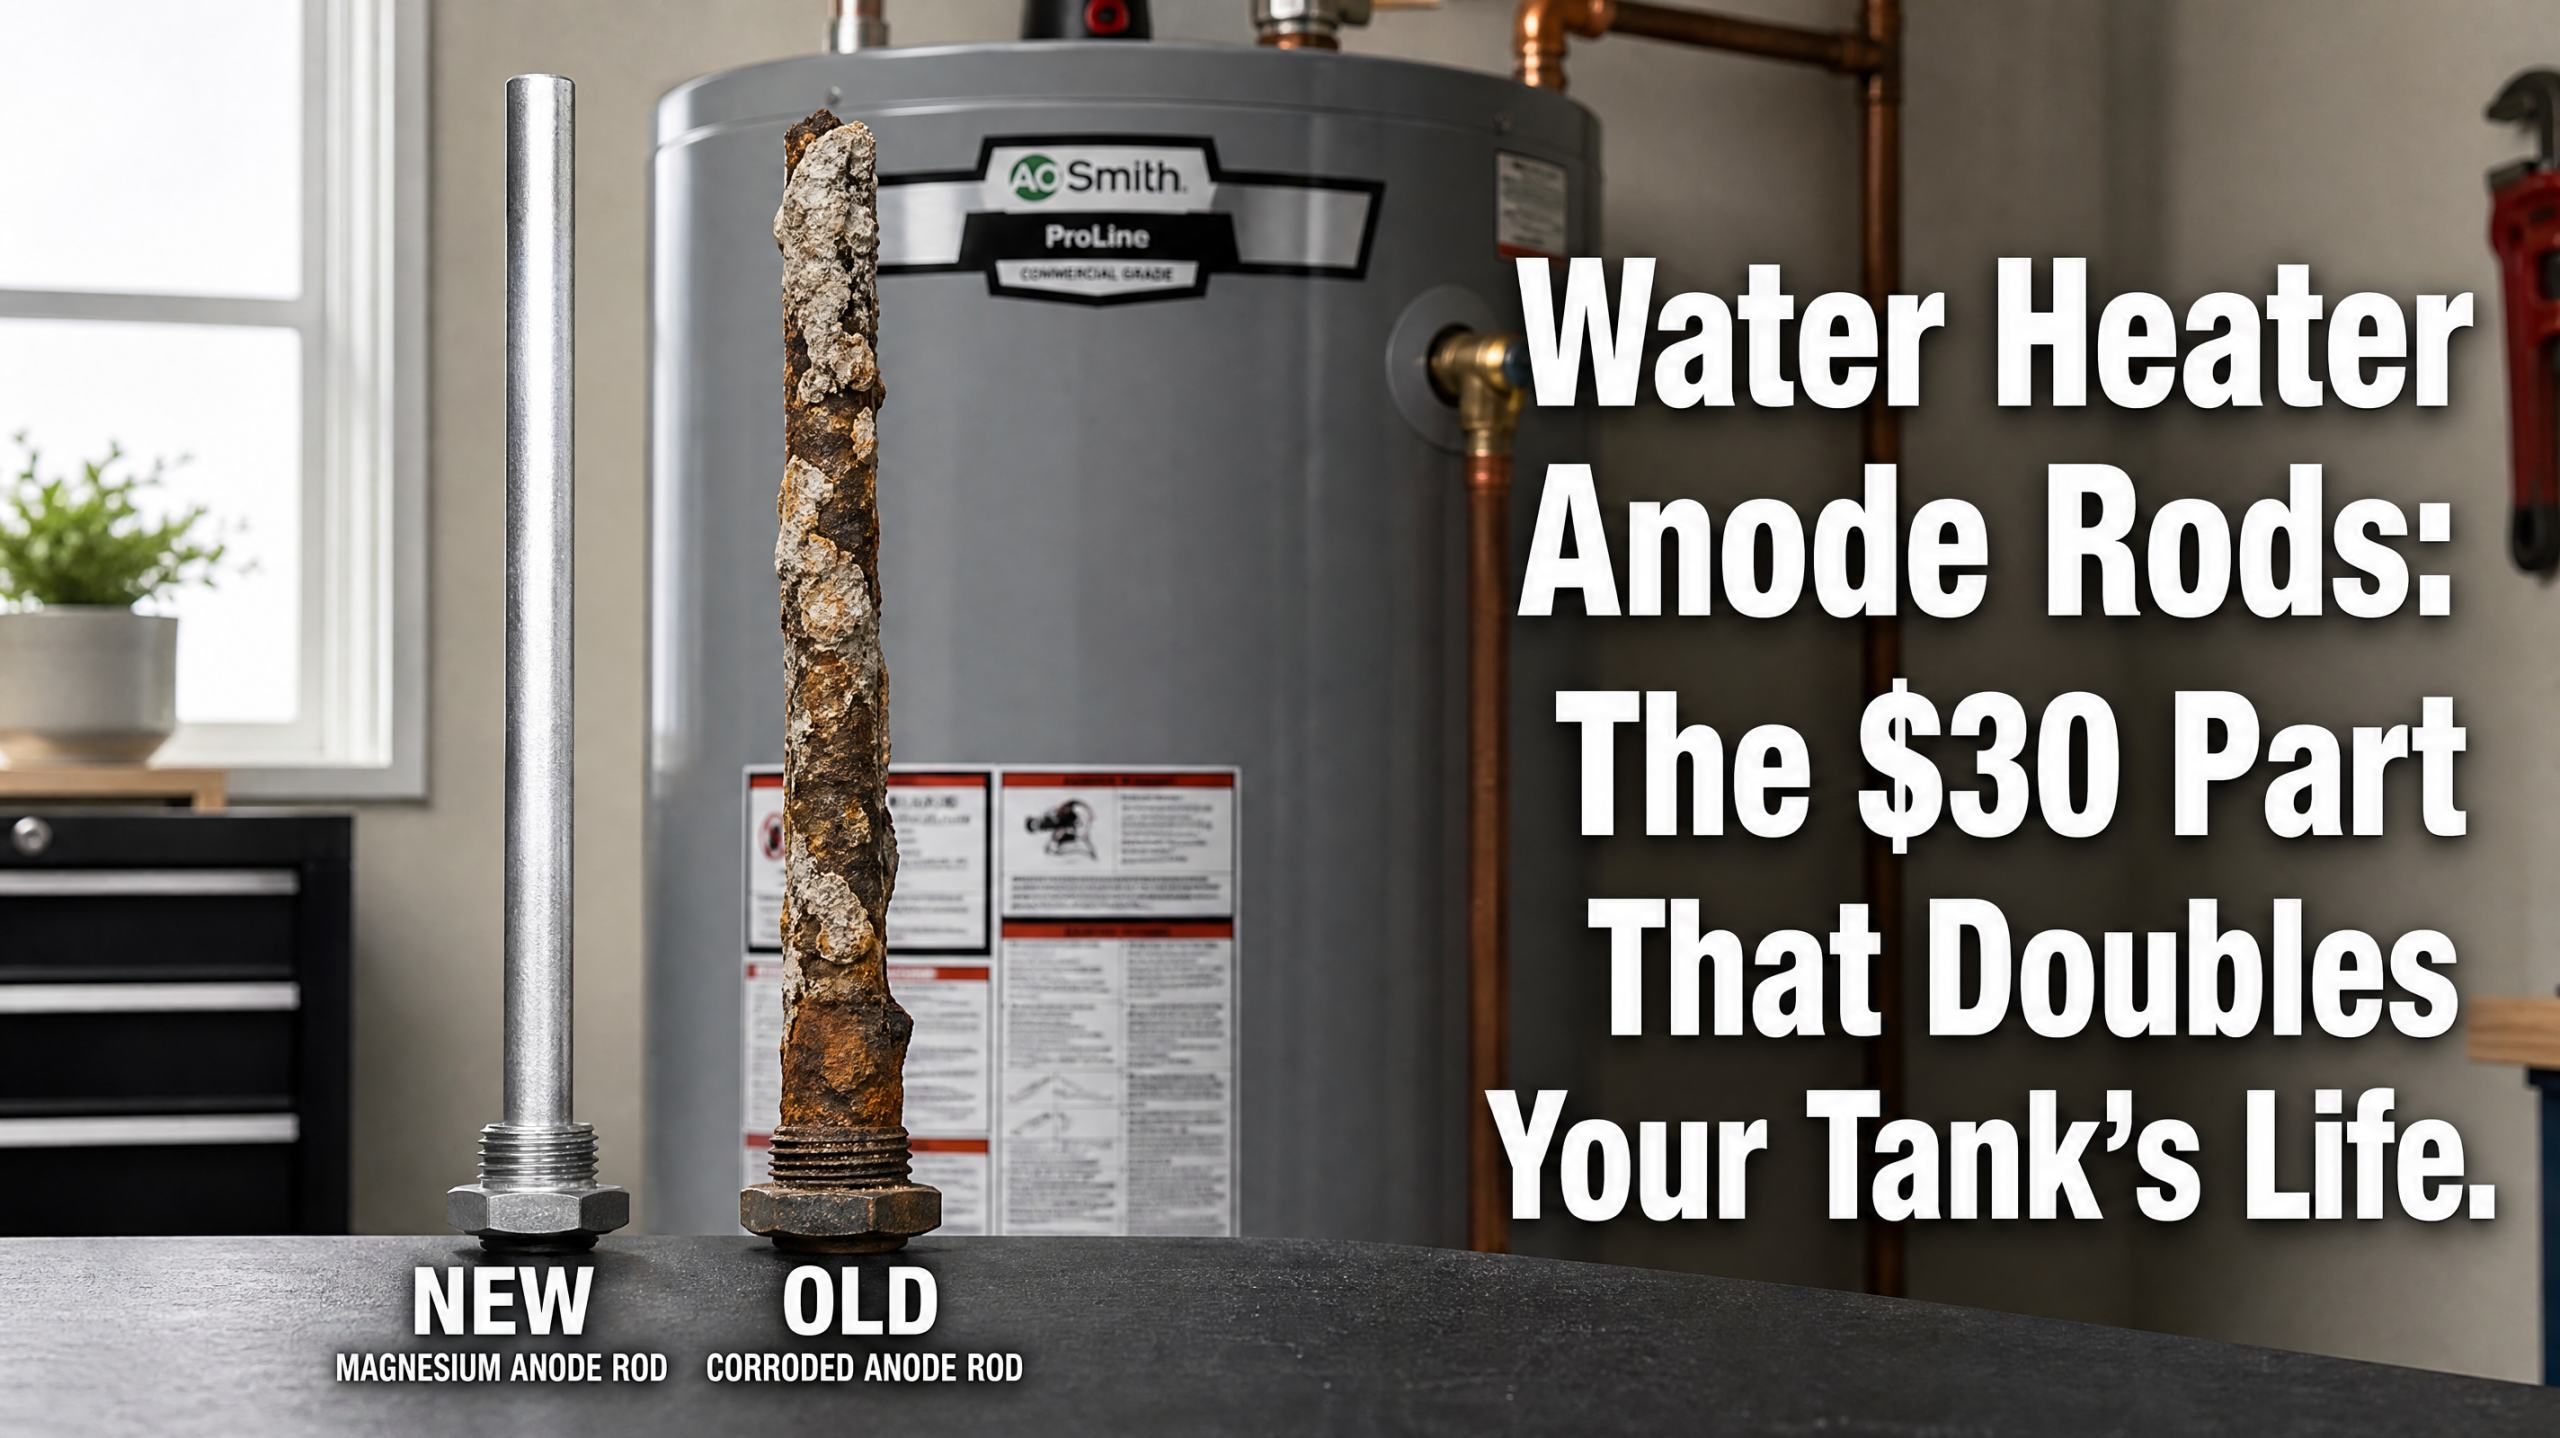
The anode rod is a long metal rod, usually magnesium, aluminum, or zinc, that threads into the top of the tank and hangs down inside it. These metals are more chemically reactive than the steel tank, so through a process called galvanic corrosion, the corrosive elements in the water attack the rod instead of the tank walls. The rod is literally sacrificing itself to save the steel, which is where “sacrificial anode” comes from. As long as there’s enough rod left to corrode, the tank stays protected. Once the rod is used up, the corrosion turns its attention to the tank itself, and the countdown to a leak begins.
Why this is the best $30 you’ll spend
A new tank, installed, commonly runs $1,000 to $1,800. A fresh anode rod costs a small fraction of that and can add many years of life. Checking and replacing it a couple of times over a tank’s life is the difference between replacing the heater every 8 years and stretching it well past 15.
How often it needs checking
There’s no universal calendar, because how fast the rod corrodes depends entirely on your water. In a home with hard water or well water, the rod works harder and wears out faster, sometimes in as little as three to five years. In a home with soft or treated city water, it may last longer. A reasonable habit is to inspect the rod every two to three years and replace it when it’s significantly consumed. The longer you go without ever looking, the more likely you are to discover the rod was gone years ago and the tank has been corroding ever since.
A common mistake is assuming a new tank doesn’t need attention. The original anode rod that came with the heater is often a basic one, and in aggressive water it can be largely consumed within the first few years, long before most owners would think to check. As home maintenance guides note, checking the rod annually is especially wise in hard-water regions.
Warning signs your rod is spent
You don’t always have to pull the rod to suspect it’s done. Watch for these:
| Rotten-egg smell | A sulfur odor in hot water often points to anode and bacteria interaction; sometimes a different rod material helps |
| Rusty hot water | Brown or discolored hot water can mean the rod is gone and the tank itself is now corroding |
| Tank age 5+ years | If it’s been years and you’ve never checked, it’s almost certainly overdue |
| Popping / rumbling | Usually sediment, but it’s a sign the tank needs maintenance attention overall |
When you do pull the rod, the rule of thumb is simple: if more than about half the core is consumed, or you see several inches of the bare steel core wire exposed, or it’s caked in calcium, replace it.
Replacing it yourself, step by step
This is a doable DIY job for someone comfortable with basic tools, and doing it yourself instead of calling a plumber can save a meaningful amount on each replacement. The trickiest part is usually just breaking the rod loose, since it can be torqued in tight. You’ll want a 1-1/16-inch socket, a breaker bar for leverage, some thread-seal tape, and the new rod. Here’s the sequence.
Step 1 — Cut the power and water
On an electric heater, switch off the breaker. On gas, turn the control to “pilot” or off. Then close the cold-water supply valve at the top of the tank.
Step 2 — Relieve pressure and drain a little
Open a nearby hot-water faucet to release pressure, then drain a few gallons from the tank’s drain valve so the water level is below the rod opening. This is also a perfect moment to flush sediment if you’re due.
Step 3 — Locate and loosen the rod
The rod’s hex head is usually on top of the tank, sometimes under a plastic cap, occasionally on a hot-water outlet. Fit the socket and breaker bar and turn counterclockwise. It may take real force; bracing the tank helps.
Step 4 — Lift it out and inspect
Pull the rod straight up; watch your overhead clearance, since a full-length rod is nearly as tall as the tank. (If clearance is tight, a segmented or “flexible” link-type rod solves the problem.) Inspect what comes out to confirm it was time.
Step 5 — Install the new rod
Wrap the threads of the new rod with thread-seal tape, thread it in, and tighten snugly. Close the drain, reopen the cold-water supply, and let the tank refill (keep that hot faucet open until water runs steady to purge air).
Step 6 — Restore power and check for leaks
Only after the tank is full, switch the breaker back on or relight the gas. Check around the new rod for any drips and snug it further if needed.
Choosing the right replacement rod
The three common materials each suit different water. Magnesium rods offer strong protection and are a good default, but in hard water or with certain bacteria they can contribute to a sulfur smell. Aluminum rods last longer and resist the odor problem better, making them a frequent choice in hard-water homes, though some people prefer to avoid aluminum in water they drink. If you’re battling persistent rotten-egg odor, a powered (impressed-current) anode is a more expensive option that doesn’t corrode away at all and lasts essentially the life of the tank, drawing a tiny amount of electricity to do its job instead. It costs more upfront but eliminates the recurring replacement and is often the definitive fix for stubborn sulfur smells. Matching the rod to your water is part of why pulling the old one and seeing how it fared is so useful: the condition of the spent rod tells you whether your current choice is keeping up with your water or losing the fight.
The cost comparison, laid out plainly
It helps to see the money side by side, because the gap is what makes this maintenance so obviously worth doing. A replacement anode rod runs roughly $20 to $50 at any hardware store or online. If you do the swap yourself, that’s the entire cost. If you hire a plumber, you might pay somewhere around $150 to $250 including labor, still a rounding error next to the alternative.
Now the alternative. When the rod is gone and the steel tank corrodes through, the tank leaks, and a leaking tank isn’t repairable; it’s a full replacement. That’s commonly $1,000 to $1,800 installed, sometimes more, plus the misery of cold showers and possible water damage if the tank lets go somewhere it can flood. So the choice is stark: a handful of $30 rod replacements spread across the tank’s life, or a premature four-figure replacement years before you should have needed one. Framed that way, skipping the anode rod is one of the most expensive forms of “saving money” a homeowner can practice.
Common mistakes to avoid
A few pitfalls trip up first-timers and even some pros in a hurry:
Forgetting the overhead clearance. A full-length rod is nearly as tall as the tank. In a tight closet you may not be able to lift it straight out. Check clearance first, and if it’s tight, buy a segmented or flexible link-type rod that bends as it comes out.
Not relieving pressure. Always open a hot tap and partially drain before unscrewing anything. A pressurized tank can spray hot water.
Turning the power back on with an empty tank. On an electric heater, energizing the elements without water surrounding them burns them out almost instantly. Fill the tank completely and purge the air first, then restore power.
Giving up when it won’t budge. The factory often torques the rod in hard. A breaker bar and bracing the tank usually does it. If it truly won’t move, that’s a fine reason to call a plumber rather than rounding off the hex head.
Skipping thread-seal tape. Wrap the new rod’s threads so it seals and so it’s easier to remove next time.
Pair it with a flush
Since you’ve already drained part of the tank to swap the rod, it’s the natural moment to flush out sediment too. Mineral sediment settling at the bottom acts like an insulating blanket, forcing the burner or element to work harder and wasting energy, and it can bury the anode rod so it can’t do its job. The Department of Energy’s guidance on storage water heaters underscores that regular maintenance protects both efficiency and lifespan. Draining until the water runs clear, then closing up, takes only a little extra time while you’re already in there.
The takeaway
The anode rod is the cheapest, highest-leverage maintenance in your home. Check it every two to three years, more often with hard or well water, replace it before it’s fully consumed, and pair the job with a sediment flush. A part that costs less than a dinner out can add the better part of a decade to a tank that would otherwise cost well over a thousand dollars to replace.
Frequently asked questions
How do I know if my water heater even has an anode rod?
Virtually every conventional tank-style gas and electric water heater has one; tankless units do not. Look for a hex-head bolt on top of the tank, sometimes hidden under a plastic cap, or it may be combined with the hot-water outlet.
Can replacing the anode rod really extend the tank’s life that much?
Yes. The rod is what protects the steel tank from corrosion. Keeping a functional rod in place can meaningfully extend a tank’s service life, potentially adding years compared to letting the rod fully deplete and allowing the tank itself to corrode.
My hot water smells like rotten eggs. Is that the rod?
Often, yes. The odor typically comes from a reaction between a magnesium anode and bacteria in the water. Switching to an aluminum or powered anode rod frequently resolves it. Flushing the tank can help too.
Is this a safe job to do myself?
For a confident DIYer with the right socket and a breaker bar, yes, as long as you cut the power or gas and shut the water first. If the rod won’t budge, you’re uncomfortable working with a gas appliance, or anything seems off, call a plumber; it’s still inexpensive and protects a costly tank.
For maintenance guidance and tank-care basics, see the U.S. Department of Energy’s Storage Water Heaters page and reputable home-improvement resources such as Bob Vila’s anode rod guide. Always cut power or gas and shut off the water supply before servicing a water heater.