Home Exterior & Yard
A wall that holds back a hillside is part landscaping, part engineering. Choosing the material is where homeowners save money or set up an expensive failure.
A retaining wall looks like a weekend landscaping project right up until you remember what it’s actually doing: holding back tons of soil and water that would very much like to slide downhill. Get the material and the build right and a retaining wall lasts decades while quietly turning a useless slope into flat, usable yard. Get it wrong and you get a bulging, leaning wall, a failed slope, and a repair bill that dwarfs what doing it properly would have cost. The material you choose drives almost everything downstream: the price, how long it lasts, how hard it is to build yourself, and whether you can even legally build it without an engineer.
Before the materials, one rule that overrides all of them. Height changes the game completely. Most building departments require a permit, and often an engineer’s stamped design, once a wall passes a certain height, commonly four feet measured from the bottom of the footing, or any height if it’s holding back an extra load (a “surcharge”) like a driveway or slope above it. Douglas County’s retaining wall permit guidance is a good example of how these thresholds work. A short garden border is a true DIY project. A tall structural wall is not, regardless of which material you pick, and treating one like the other is the classic costly mistake.
Interlocking concrete block
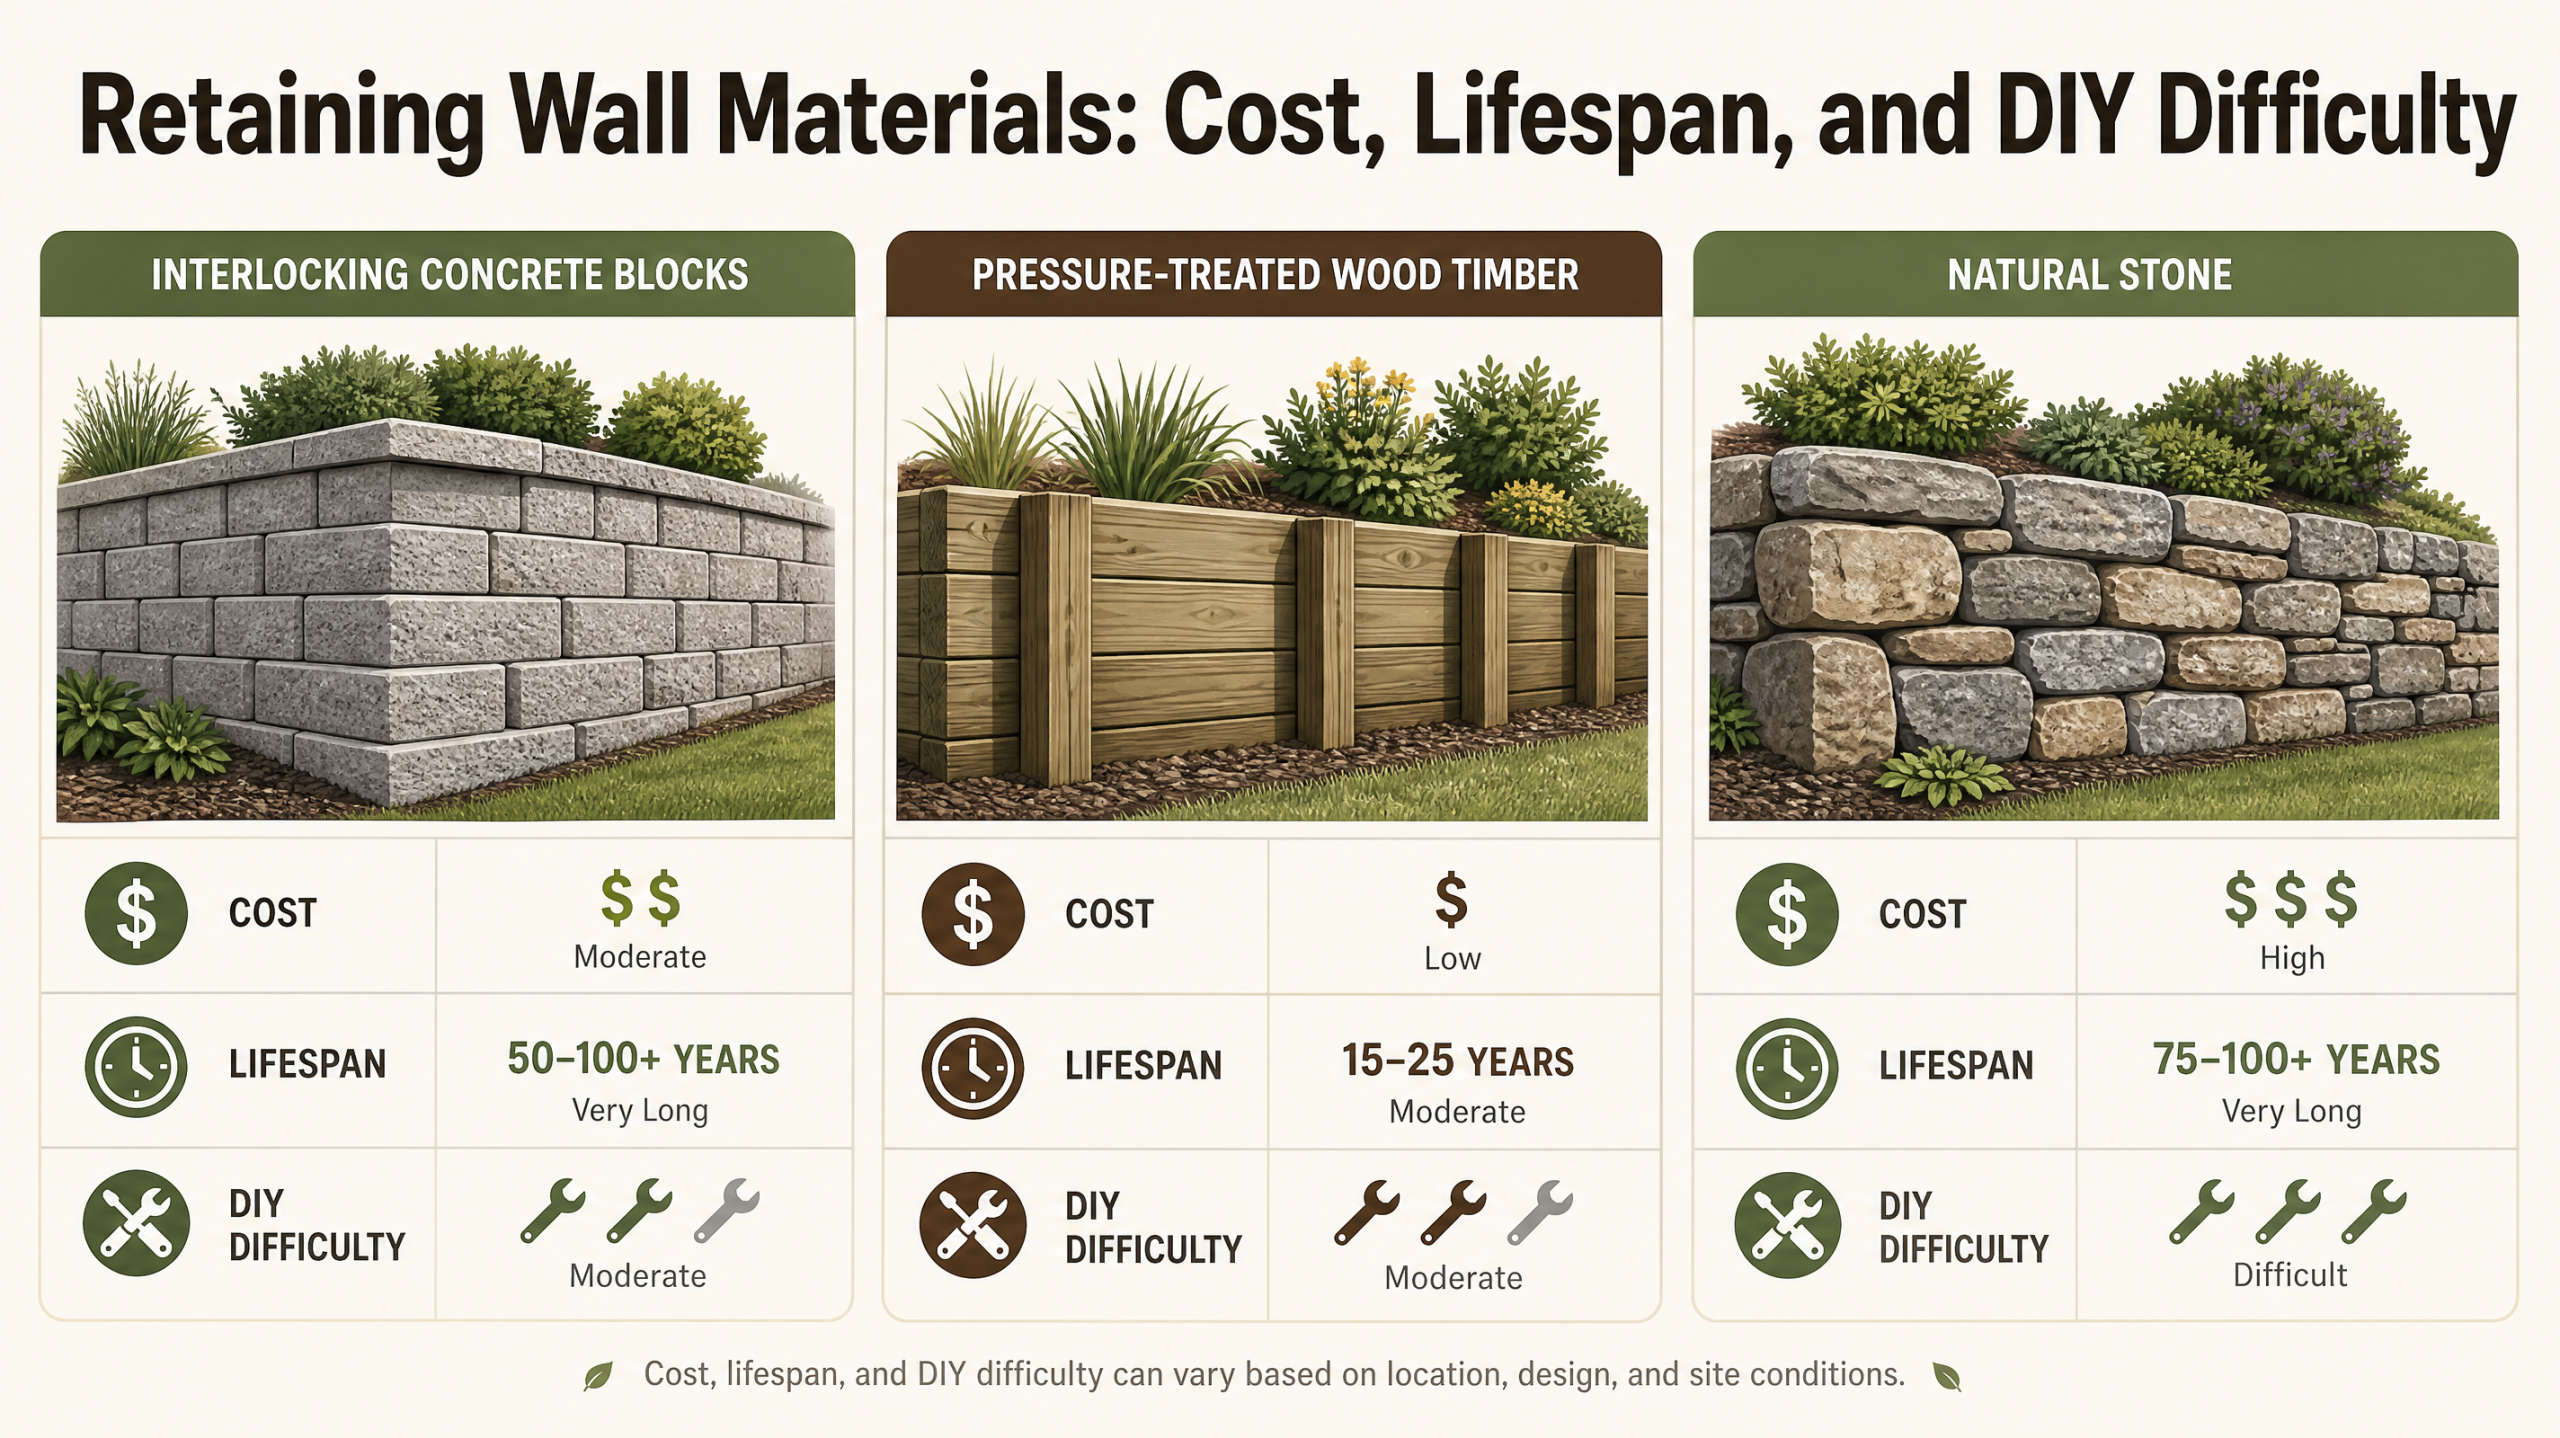
These are the molded segmental blocks you see at every home center, designed with a lip or pin system so each course locks into the one below and steps slightly back into the slope. They’ve become the default for residential walls for good reason: they’re engineered for the job, widely available, come in many colors and textures, and are the most DIY-friendly of the durable options because the interlocking design does much of the structural thinking for you.
PROFILE — INTERLOCKING BLOCK
Cost: moderate · Lifespan: 40+ years · DIY difficulty: moderate (within height limits) · Best for: most residential walls under the permit threshold.
The cost is moderate per square foot of wall face, and a well-built block wall easily lasts forty years or more. The DIY caveat is that the part you can’t see is the part that matters: a compacted gravel base, proper drainage gravel behind the wall, and a perforated drain pipe to relieve water pressure. Most failed block walls failed because someone skipped the drainage and the base, not because of the blocks. Within the legal height limit and with the prep done right, this is the sweet spot for ambitious homeowners.
Natural stone
Stacked natural stone is the most beautiful option and the most timeless; a dry-stacked stone wall can look like it grew out of the landscape and last generations. There are two flavors: a true dry-stone wall, fitted without mortar by a skilled hand, and mortared stone. The appeal is obvious, and stone’s lifespan is essentially indefinite when built well.
PROFILE — NATURAL STONE
Cost: high · Lifespan: indefinite · DIY difficulty: high (real skill required) · Best for: visible feature walls, character, where budget allows.
The price is the highest of the common materials, both for the stone and for the skilled labor, because fitting irregular stone into a stable, self-supporting wall is genuinely a craft. This is the option where DIY ambition most often outruns ability. Building a low decorative stone border is achievable; building a structural dry-stone retaining wall that won’t bulge is a skill that takes years to develop. For a tall or load-bearing stone wall, hire someone who does it for a living.
Poured concrete
A poured, steel-reinforced concrete wall is the strongest option and the right call for tall walls and serious loads. It’s a continuous monolithic structure rather than stacked units, so there are no joints to shift, and engineers love it for difficult sites. It can be faced with stone veneer or stamped for appearance, getting you strength plus looks.
PROFILE — POURED CONCRETE
Cost: high · Lifespan: 50+ years · DIY difficulty: very high / not DIY · Best for: tall, structural, engineered walls.
This is not a DIY material in any meaningful sense once you’re past a tiny border. Forming, reinforcing, and pouring a structural wall correctly is professional work, and tall concrete walls almost always require engineering and inspection anyway. The cost is high, but for a tall wall holding a significant slope, it’s the safest long-term money. Don’t try to save by pouring a structural wall yourself; this is exactly the wall whose failure is dangerous.
Timber
Pressure-treated timber or landscape ties make the cheapest, fastest, most beginner-friendly wall, and for a low garden terrace they’re a perfectly reasonable choice. Timber is light, cuts with ordinary tools, and goes up quickly. For a homeowner who wants a modest raised bed or a short terrace and accepts a finite lifespan, it’s the easy entry point.
PROFILE — TIMBER
Cost: lowest · Lifespan: ~15–20 years · DIY difficulty: low · Best for: short garden terraces and beds.
The trade-off is lifespan. Wood in contact with soil and moisture eventually rots, even when pressure-treated, so a timber wall is a decade-or-two solution, not a permanent one. It’s also less suited to tall or heavily loaded walls. Think of timber as the budget, short-horizon, low-wall material, and don’t ask it to do a structural job it isn’t built for.
The numbers, compared
| Material | Cost | Lifespan | DIY |
|---|---|---|---|
| Timber | Lowest | 15–20 yrs | Easy |
| Interlocking block | Moderate | 40+ yrs | Moderate |
| Natural stone | High | Indefinite | Hard |
| Poured concrete | High | 50+ yrs | Not DIY |
Drainage is the real make-or-break
Whatever material you choose, the single most common cause of retaining wall failure has nothing to do with the wall face and everything to do with water. Soil behind a wall holds water, and saturated soil is dramatically heavier and pushes far harder than dry soil. A wall designed for dry conditions but drowning in trapped water is being asked to hold a load it was never built for, and it bulges, cracks, or topples. That’s why every durable wall needs the unglamorous trio behind it: a compacted gravel base, a column of free-draining gravel against the back of the wall, and a perforated drain pipe at the bottom to carry water away through weep holes or to daylight.
If you take one thing from this, let it be that the money and effort spent on drainage and a proper base are not optional extras; they are the wall. A beautiful stone or block face on poor drainage is a slow-motion failure. A modest wall with excellent drainage outlasts a fancy one without it.
The unseen 80 percent: base, batter, and backfill
The visible wall face is the part homeowners obsess over and the part that matters least to whether the wall survives. The work that actually holds a wall up is mostly underground or hidden behind it. Three things stand out beyond the drainage already discussed.
First, the base. A retaining wall needs a level, compacted foundation of crushed gravel beneath the first course, set below grade so the bottom course is partly buried. A wall built on soft, uncompacted, or unlevel ground will settle and lean no matter how nice the blocks are. Compaction here is not optional; loose fill compresses unevenly under load and the wall follows it down.
Second, the batter, or backward lean. A good retaining wall doesn’t stand perfectly vertical; it tilts slightly back into the slope it’s holding. Interlocking block systems build this in through their stepped design, but it’s a principle worth understanding: leaning into the hill lets gravity help the wall resist the soil rather than fighting it head-on. A wall built dead plumb, or worse leaning outward, is working against itself.
Third, for taller or heavily loaded walls, soil reinforcement. Engineers often specify geogrid, a strong mesh laid in horizontal layers extending back into the compacted backfill behind the wall. The grid ties the wall to the soil mass so that the wall and a wedge of earth behind it act together as one heavy, stable unit. This is a big reason tall walls need engineering: the design of that reinforcement, how deep, how many layers, what spacing, is specific to the height, the soil, and the load, and getting it wrong is what turns a tall wall into a collapse.
Tiering a tall slope
When a slope is too tall for a single reasonable wall, the instinct is to build a series of shorter terraced walls stepping up the hill, which is often both attractive and practical. But be careful: building departments frequently treat closely-spaced tiered walls as a single tall wall for permitting and engineering purposes, because an upper wall sitting near a lower one imposes a surcharge on it. In other words, two four-foot walls stacked close together may be regulated like one eight-foot structural wall rather than two exempt little ones. Spacing the tiers far enough apart changes that, but the spacing required is itself an engineering question. Don’t assume that splitting a tall wall into tiers automatically dodges the permit and engineering requirements; it often doesn’t.
An honest DIY reality check
DIY can save a substantial amount on labor for the right project, and a low interlocking-block or timber wall is a satisfying, achievable weekend-scale job for a capable homeowner who respects the base and drainage steps. The trouble is that the failure mode of an under-built wall isn’t cosmetic; a leaning or collapsing wall can damage property, undermine a slope, and cost far more to fix than to have built right the first time. So the honest test is less about your skill with blocks and more about the wall’s job: if it’s short, holds only its own modest slope, and falls under your local permit threshold, build it yourself with care. If it’s tall, holds a real load, or sits where a failure would be dangerous or expensive, the engineering and professional build aren’t where you save money, they’re what makes the project worth doing at all.
Bottom line
For most homeowners, interlocking block is the best balance of cost, longevity, and buildability for a wall under the permit height. Timber suits cheap, short garden terraces; stone buys timeless beauty at a price and a skill cost; poured concrete is the engineered answer for tall, loaded walls. Above the height threshold, or with any surcharge, get a permit and an engineer regardless of material, and never, ever skimp on drainage.
Frequently asked questions
How tall can I build a retaining wall without a permit?
It varies by jurisdiction, but many areas exempt walls under three or four feet measured from the bottom of the footing, with the common threshold being four feet. Any wall holding a surcharge (a slope, driveway, or structure above it) often needs a permit regardless of height. Always confirm with your local building department before you dig.
What’s the most cost-effective retaining wall material?
For a permanent wall, interlocking concrete block usually offers the best balance of moderate cost and long life. Timber is cheaper upfront but lasts far less time, so over decades the block often costs less per year of service.
Can I build a retaining wall myself?
A short timber or interlocking-block wall within the permit height is a realistic DIY project if you get the base and drainage right. Tall walls, natural stone craftsmanship, and structural concrete are jobs for professionals, and tall walls usually require engineering and inspection anyway.
Why do retaining walls fail?
Most often because of poor drainage and an inadequate base. Water trapped behind the wall hugely increases the force on it. A proper gravel base, drainage gravel, and a drain pipe prevent the most common failures regardless of the facing material.
For permit and engineering thresholds, see your local building department; an example of typical requirements is Douglas County’s retaining wall permit page. Requirements vary by location, so always verify locally before building.