The decisions that most intimately shape your off-grid experience aren’t about solar panel wattage or well depth—they’re about how you handle the one biological necessity you can’t opt out of. Research from the Washington State Department of Health shows that improperly installed composting toilets are the #1 cause of abandoned off-grid properties, not power failures or water issues. Yet most cabin owners spend less time planning their waste system than they do choosing cabinet hardware.
This planning gap creates a brutal paradox: the system that has the most direct impact on your health, comfort, and property value receives the least thoughtful design. While we obsess over Instagram-worthy loft spaces and trophy wood stoves, the composting chamber quietly determines whether your cabin is a sanctuary or a health hazard. Understanding how these systems actually operate—and learning to install them correctly—transforms you from a hopeful weekender into a resilient homesteader.
The Invisible Architecture: How Waste Management Shapes Your Off-Grid Reality
Every aspect of your remote living experience rests on a foundation of waste processing decisions. The location of your composting chamber, the diameter of your vent pipe, the voltage of your fan—these aren’t random details but deliberate engineering choices that affect whether you smell fresh forest air or sewage every morning.
Consider something as mundane as vent pipe insulation. A non-electric Sun-Mar toilet requires 4-inch vent pipe installed as vertically as possible to enable passive airflow . In a warm climate, you can run that pipe straight up through your roof and forget it. In a mountain cabin where temperatures hit -20°F, that same uninsulated pipe becomes a frozen straw, trapping moisture and odors inside your living space. The difference? A $15 roll of pipe insulation versus a $2,000 remediation bill and a cabin you can’t use for three months.
The cumulative effect of these micro-decisions creates macro-outcomes. Cabins with properly installed composting toilets can operate for years without issue, generating valuable compost for fruit trees. Properties where installation was an afterthought often become legal liabilities, with health departments issuing cease-and-desist orders that make the land unsellable. The difference isn’t luck—it’s the presence or absence of systems thinking.
The System Decision Tree: Choosing Your Waste Infrastructure
Self-Contained Units: Toilet and composting chamber in one. Best for single-story cabins, tiny homes, and DIY installations. Examples: Nature’s Head, OGO Origin, Air Head.
Central Systems: Toilet connects to separate composting chamber below or adjacent. Best for multi-story structures or high-capacity needs. Examples: Sun-Mar Centrex, Phoenix.
Electric Systems: Use 12V fans and sometimes heaters. Require consistent power (solar/battery) but process waste faster and control odor better.
Non-Electric Systems: Rely on passive ventilation. Zero power draw but slower decomposition and more sensitive to installation errors.
Batch Systems: Multiple interchangeable chambers. One fills while others cure. Most hygienic end product but requires more space.
The Psychology of Avoidance: Why We Procrastinate on the Most Critical System
If composting toilets are so critical, why do cabin owners consistently ignore them until the last minute? The answer lies in a combination of visceral disgust, information overwhelm, and a cognitive bias that underestimates cascading consequences.
The Yuck Factor: We’re Hardwired to Avoid Waste
Human brains are evolutionarily programmed to delegate waste management to unconscious processes. Thinking about fecal matter triggers genuine physiological discomfort. This visceral aversion leads to magical thinking: “I’ll figure it out later” or “How hard can it be?” Meanwhile, you’ve already framed your bathroom and installed drywall, making proper vent routing nearly impossible.
The Complexity Paralysis: Too Many Variables, Too Little Guidance
Composting toilet installation involves simultaneous mastery of plumbing, electrical, structural, and biological systems. You need to understand vent stack diameter, CFM ratings, galvanic corrosion, carbon-to-nitrogen ratios, and local health codes—all while dealing with a topic that makes you want to wash your hands just thinking about it.
This complexity serves as a gatekeeping mechanism. Professional installers understand the system while DIY builders remain excluded. The result is a two-tiered market: expensive professional installations that work flawlessly, and budget installations that fail catastrophically, reinforcing the myth that composting toilets “don’t really work.”
The Optimism Bias: “I’ll Just Use It on Weekends”
Cabin owners consistently underestimate usage frequency. You envision occasional weekend visits, so you opt for a minimal non-electric system. Two years later, you’re working remotely and living there full-time through winter. Your under-sized system freezes solid, and you’re facing a $3,000 upgrade mid-season. The usage pattern assessment is critical: residential, day-use, or cottage systems have fundamentally different design requirements .
Pre-Installation Intelligence: The Site Assessment Nobody Does (But Everyone Should)
Before you buy a single component, conduct a three-part site assessment that takes less than two hours but saves you hundreds of hours of regret.
1. Climate Reality Check
Measure your temperature extremes. Will the composting chamber experience freezing temperatures? The composting process stops below 55°F and frozen material may never thaw properly, even in summer, due to insulation . If you’re in climate zone 6 or colder, you must either:
- Install the composting chamber in a heated space (65°F minimum)
- Insulate all vent pipes with heat tape for extreme climates
- Use a double-pipe insulation system (3″ pipe around 2″ insulated pipe)
- Accept that you’ll operate as a “holding tank” in winter, not an active composter
2. Legal Landscape Mapping
Call your county health department and building inspector. Ask specifically about:
- Composting toilet permits (many jurisdictions require them)
- Gray water disposal regulations (urine diversion requires separate handling)
- End-product disposal rules (often must be buried or landfilled, not spread on food crops)
- Plumbing code requirements for vent stacks
Some counties, especially in off-grid-friendly states like Arizona or New Mexico, have minimal requirements. Others treat composting toilets as experimental technology requiring engineering approval. Know before you buy.
3. Usage Pattern Honesty
Be brutally honest about how you’ll use the cabin:
- Cottage system: Occasional weekend use (2-4 people, 2-3 days/month)
- Day-use: High traffic, short duration (think hunting cabin or AirBnB)
- Residential: Full-time living, daily use through all seasons
An undersized system used residentially will fail within months. An oversized system for occasional use wastes money and may dry out too much between uses.
The Site Assessment Checklist (Do This First)
Temperature Range: Record coldest winter low and hottest summer high
Structural Access: Can you run a vent pipe straight up through the roof? Any cathedral ceilings or loft spaces blocking vertical runs?
Power Availability: Solar system size? Battery capacity? Can you afford 0.48Ah/day continuous draw for the fan?
Floor Construction: Wood subfloor (easy mounting) or concrete slab (requires plywood platform or core drilling)?
Legal Clearance: Written confirmation from health department or building inspector (get it in writing)
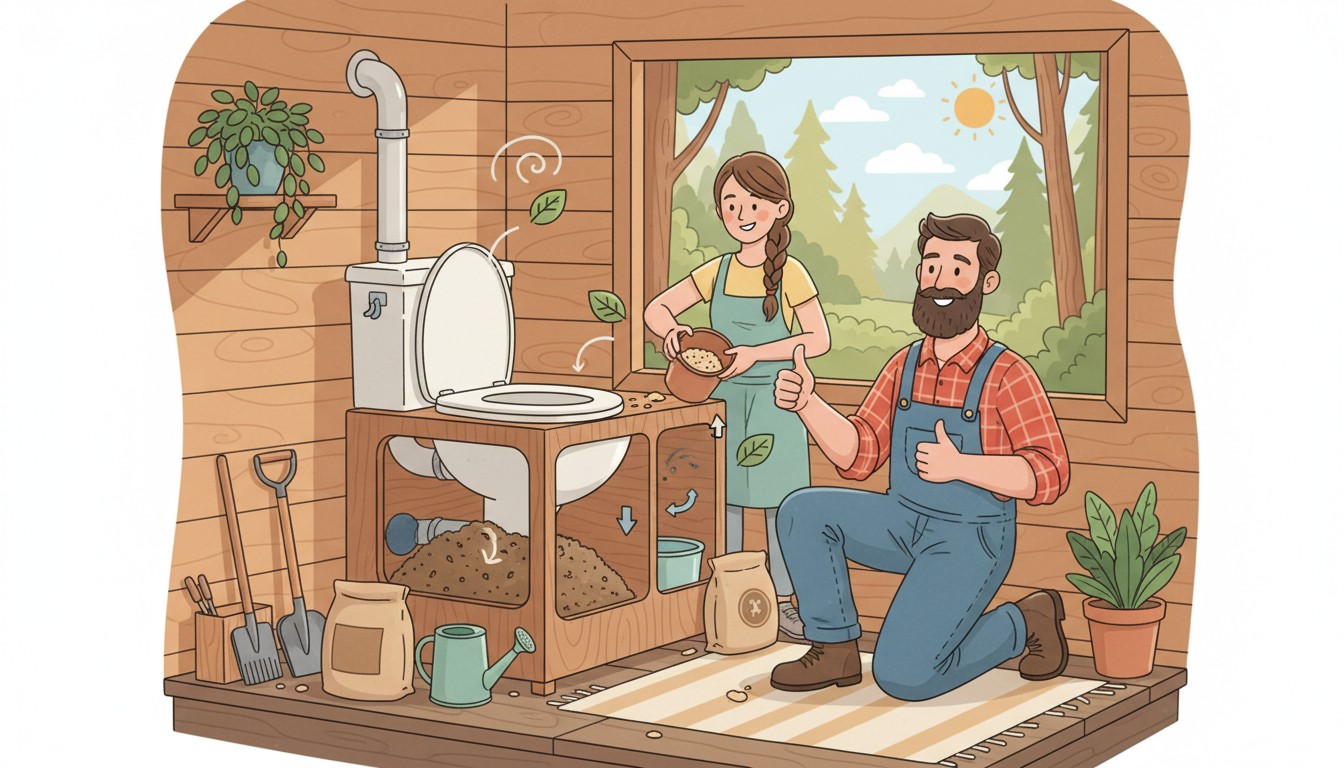
The Installation Execution: Step-by-Step From Box to Functional
We’ll focus on self-contained systems (Nature’s Head, OGO, Air Head) as they’re most common for cabins. Central systems require professional installation due to structural complexity .
Step 1: Placement and Floor Mounting
Choose a location that allows:
- Minimum 6 inches clearance behind the unit for vent hose
- Easy access to empty the solids bin (every 2-4 weeks for 2 people full-time)
- Privacy without compromising ventilation (don’t hide it in a sealed closet)
For wood floors: Screw the mounting feet directly into subfloor using lag bolts. The OGO Origin includes mounting screws; drill pilot holes to prevent splitting .
For concrete floors: Don’t drill masonry. Instead, mount the toilet to a 3/4-inch plywood platform (18″x24″ minimum) and secure that platform to the floor with construction adhesive or tapcons. This allows future repositioning and prevents cracking the slab .
Pro tip: Outline the toilet base with blue painter’s tape before drilling. This visual boundary prevents the unit from shifting during mounting and ensures perfect alignment .
Step 2: The Ventilation Imperative (Your System’s Lifeline)
This is non-negotiable and where 90% of DIY failures occur. The vent system must:
- Remove moisture (the primary cause of odor)
- Provide oxygen for aerobic decomposition
- Create negative pressure to pull air from the toilet bowl outward
Electric systems (Nature’s Head, OGO): Use 2-inch thin-wall PVC (not schedule 40) with a 12V inline fan. The fan draws 0.02A (0.48Ah/day)—negligible for most solar setups . Run the pipe as straight as possible; each 90° elbow reduces efficiency by 15% .
Non-electric systems: Require 4-inch PVC with passive draft. Must be vertical with minimal bends. In cold climates, install a 12V fan anyway to prevent downdrafts and increase evaporation .
Installation process:
- Cut a 1-5/8″ hole through the wall or floor using a hole saw
- Mount the exterior vent cover with the opening facing downward at 45° to prevent rain/bugs
- For thick walls (cabin siding + insulation), use 1-1/4″ PVC pipe as a sleeve
- Seal all gaps with silicone caulk—this is critical for odor control
- Extend vent pipe 24-30 inches above roof peak to avoid downdrafts
- Install a rain cap with insect screen on the terminus
Cold climate upgrade: Wrap all exterior vent pipe with heat tape and foam insulation. In extreme cold (Alaska, northern Canada), run a 3-inch pipe around your insulated 2-inch pipe for double-layer protection .
Step 3: Power Connection (Off-Grid Specifics)
Most composting toilets run on 12V DC, perfect for solar systems. The OGO Origin’s fan draws just 0.48Ah/day—less than most LED lights . However, you must:
- Fuse the circuit: Use a 1-amp inline fuse to protect the fan motor
- Wire gauge: 18 AWG is sufficient for runs under 10 feet; use 16 AWG for longer runs
- Connect to battery, not solar panel directly: The fan needs constant voltage; panels fluctuate
- Test before mounting: Power up the fan and confirm operation before securing the toilet to the floor
If you only have 110V AC (generator or grid power), purchase a wall transformer. Nature’s Head recommends their specific transformer to avoid voltage mismatches that can burn out the fan .
Step 4: Initial Setup and First Use
Before first use, add 1-2 gallons of moistened coir, peat moss, or sawdust to the solids chamber. This “starter” provides:
- Initial carbon material to balance nitrogen-rich waste
- Moisture absorption to prevent soggy compost
- Microbial inoculation (if using finished compost as starter)
Spray the bowl with water after each use to keep the urine diverter clean. Add one cup of bulking material after each solids deposit. This isn’t optional—it’s the biological engine of the system .
Climate Warfare: Special Considerations for Extreme Environments
Freezing Temperature Management
The single biggest failure point in cabin installations. Here’s the reality:
Occasional winter use (1-2 weekends/month): Operate as a holding tank. Do not rotate the drum if compost is frozen. The fan will still run and control odor, but decomposition pauses. When you leave, add extra bulking material to absorb moisture .
Continuous winter use: You must maintain the composting chamber above 55°F. Options include:
- Locating the unit in a heated room (even a small utility room with a propane heater)
- Insulating the entire enclosure with R-13 or better
- Installing a thermostatically controlled heat pad under the unit (15-30 watts)
- Using a fan speed controller to reduce cold air infiltration when not in use
Critical: Never add antifreeze to “winterize”—it kills the beneficial bacteria and makes the waste toxic .
High Humidity Environments
Coastal cabins and rainforest locations face the opposite problem: excess moisture. Upgrade to a high-CFM fan (4.3 CFM vs. standard 2.5 CFM) to increase evaporation. The OGO Origin offers this upgrade specifically for humid climates . Add extra bulking material (2 cups per use vs. 1 cup) and consider a small dehumidifier in the bathroom.
The Maintenance Protocol: Realistic Schedules That Don’t Make You a Slave
A properly installed composting toilet requires less maintenance than a conventional toilet. The key is consistency, not intensity.
The Legal Minefield: Code Compliance That Doesn’t Derail Your Dream
Composting toilets occupy a gray area in many jurisdictions. Your strategy should be:
- Call the county health department first: Ask about “alternative waste disposal systems” or “waterless toilets.” Don’t say “composting toilet” initially—some officials have outdated negative associations.
- Request written approval: A verbal “yeah, that should be fine” won’t protect you when a neighbor complains. Get documentation.
- Understand end-product rules: Most jurisdictions require finished compost to be buried or landfilled, not spread on vegetable gardens. The NSF International standard (fecal coliform <200 MPN/gram) is the benchmark .
- Permit strategically: In some areas, installing a composting toilet as “temporary” or “seasonal” use bypasses stringent septic requirements. Once it’s operational and problem-free, converting to “permanent” is easier.
Off-grid friendly states: Arizona, New Mexico, Texas, and parts of Colorado have minimal regulations for remote properties. Regulatory heavy states: California, Washington, and New England states often require engineer-stamped plans and inspections.
The Compliance Checklist
Health Department: Written approval for installation
Building Department: Permit for structural vent penetration (if required)
Environmental: Gray water disposal plan for urine (may require separate leach field)
HOA/Covenants: Review CC&Rs; some prohibit “alternative waste systems”
Insurance: Notify homeowner’s insurance; some require specific system certifications
Real-World Installations: What Worked, What Failed, and Why
The Colorado Cabin That Got It Right
A couple building a 400 sq ft cabin at 9,000 feet elevation chose a Nature’s Head self-contained unit. They installed it in a heated mechanical room (maintained at 55°F minimum), ran 2-inch vent pipe straight up through the metal roof with proper flashing, and powered the fan from a 100W solar system. Five years later, they’ve had zero odor issues, empty the solids bin monthly, and use the finished compost on their ornamental trees. Their secret? They spent 10 hours planning before spending $1,000 on the system.
The Tennessee Weekender That Failed
A family installed a non-electric Sun-Mar in their weekend cabin, running the 4-inch vent pipe through the wall at a 45° angle (minimum allowed) without insulation. During a particularly cold February, the vent froze solid. Moisture built up inside the unit, creating anaerobic conditions and horrific odor. They abandoned the cabin for the season and later spent $800 converting to a correctly installed electric system with a high-CFM fan and insulated vent. Their mistake? Believing the passive system would “work fine” in their climate without understanding the physics of condensation in cold pipes.
The Arizona Off-Grid Homestead That Went Pro
Full-time homesteaders with three kids installed a Phoenix central composting system in a dedicated cinder block outbuilding. They ran 3-inch vent pipe 15 feet vertically, installed a thermostatically controlled heater for winter, and plumbed urine to a gray water leach field approved by the county. The system processes waste from five people year-round, producing finished compost they use on their orchard. Initial cost: $4,200. Time spent: 40 hours of installation. Payoff: They’ve never paid a septic pumping bill and have true water independence.
Troubleshooting Common Failures: The Diagnostic Guide
Your Waste System Is Your Lifeline
The composting toilet you’re avoiding isn’t a disgusting inconvenience—it’s the most sophisticated piece of sustainable technology in your off-grid arsenal. It transforms a biological necessity into a resource, eliminates your dependence on expensive septic infrastructure, and proves that you can live comfortably anywhere on earth without municipal services.
Your power to master this system doesn’t depend on plumbing experience or engineering degrees. It depends on one thing: your willingness to think through the entire process before you buy. The installation will happen whether you plan it or not. The waste will decompose—or not—whether you understand the biology or not. You can be the cabin owner with an odorless, maintenance-free system that produces valuable compost, or you can be the owner who posts on forums that “composting toilets don’t work.”
The choice is yours. Start small. Pick one system. Read the manual. Call your health department. Your resilience journey begins with a single decision to face the topic most people avoid—and to master the invisible foundation that makes off-grid living truly sustainable.
Key Takeaways
Composting toilets are the critical, invisible foundation of off-grid living—poor installation leads to odor, health hazards, and property devaluation.
System selection (self-contained vs central, electric vs passive) must match your actual usage pattern and climate reality, not optimistic assumptions.
Ventilation is the non-negotiable lifeline—2-inch PVC with active fan for electric units, 4-inch vertical pipe for non-electric, with mandatory insulation in freezing climates.
Off-grid power for electric systems is minimal (0.48Ah/day) but requires proper 12V wiring, fusing, and battery connection—never connect directly to solar panels.
Legal compliance varies dramatically by jurisdiction—always get written approval from health departments before installation to avoid costly remediation orders.